Showing posts with label holiday. Show all posts

Sunday, December 25, 2011

Wednesday, November 2, 2011

Halloween Hangover

October is a fun month, but between Kadences birthday and Halloween I'm glad it's over.
seriously, do you know how many parties those two events alone entail?
I needed all day yesterday just to recover.


On top of the normal craziness of Halloween, Kadence got her hair cut on Sunday 
but was unhappy with the results so I had to re-do it on Monday for her. 
(and it looks freakin' awesome if I do say so myself - post on that tomorrow)
She also wanted it dyed red. 
Did I actually just dye my 11 year olds hair?
yes.
yes I did.

Obviously, after dealing with the hair, we had to style it appropriately for Halloween.
Then onto the make-up.
Oh yeah, guess I have to make a costume too, huh?
So we sewed this up quickly and got her out the door just in time to trick or treat.


Anthony was a zombie at a neighborhood haunted house. 
He looked pretty awesome - but took off early so no pictures of that kid this year.


Monday, October 31, 2011

Friday, October 7, 2011

Round Robin Valentine Block

I'm participating in a Round Robin (kinda like a swap) and this month I had to create a 14 inch block for a Valentine themed quilt. The owner had already supplied the fabrics she wanted incorporated, including the panels. 
(it's a Moda from a couple years back, can't remember the line...)


Now, I am not a quilter. I joined a quilt guild with the intention of learning to quilt.
With that said, I received this with 2 blocks already completed by other participants.
When this thing finally gets all put together I don't want my block to stick out like a sore thumb.
(oh, that's the one Leslie did. isn't that precious
and if you have never lived in the south, let me tell you, precious is not a compliment) 


You could probably already tell that this was the block I made.
It's way simple.
And, I totally cheated by using someone else's left over strip of pieced scraps.
Since I'm more of an embellish-er than a piecer I appliqued some hearts on the side and couched the word "love" onto my block. 


Honestly, I am diggin' the ric-rac "love".   
Now I'm wondering what else could I do with some ric-rac word art?

Sunday, July 4, 2010

Happy Fourth of July!


...remembering on this day that freedom isn't free...
Wishing you a wonderful Independence Day,
The Duran Clan

Saturday, June 26, 2010

Christmas in July, ala Moda!

Okay, not quite July, but close enough, right?

One reason I love Summer?
Christmas fabrics!
This is the time of year most holiday fabrics are released -
giving you plenty of time to get those projects started and finished, right?
Well, maybe not always...

My favorite collection so far?

12 days of Christmas
by Kate Spain for Moda

I pre ordered these in May, and they were worth the wait.
Just look at all those blissful yards of yumminess!
I can't wait to start sewing up lots of little Christmas dresses, jackets, and all kinds of other boutique goodness!

I love fabric,
but I LOVE Moda fabrics the mostest!


Now I only need this print, and I'll be set!
for this collection at least...

I wonder how many others out there already are starting to pick up their holiday fabrics - and better yet, I wonder how many are starting their Christmas projects?!
I'm not that far!

Saturday, April 3, 2010

Tie-Dyed and Paper Mache Easter Eggs

This year we put a little spin on our traditional Easter egg dying method, and tie dyed them.
Literally
using silk ties
I got the idea from the girls over at Best Bites - they looked so amazing I had to try it!
I found my ties at the thrift store for 2 bucks a piece. Anthony did the honors of picking them out, I think he made some great choices!
Didn't they turn out lovely?


I was also inspired by Kim and Kris from The DIY Dish to make some of their faux paper mache eggs as well.
I love these because they don't scream EASTER! ya know?
They'd just look pretty for spring nestled in, well, a nest!


Of course we made some more of the panoramic sugar eggs as well, and Kadence had a friend over to join in the fun. I decided to try making one from a regular ol' plastic Easter egg, and it worked! Well kind of, I didn't attempt to hollow it out so it's not a "panoramic" egg, but it's still super cute.

You can find the tutorial for making panoramic sugar eggs below!

We had so much fun trying new egg techniques this year I think each one will become a tradition from here on out!
What ever method you use, I hope your eggs came out lovely, and you have a Blissful Easter!

Panoramic Sugar Easter Egg Tutorial

Start a new Easter tradition by making some panoramic sugar eggs this weekend! They look complicated, but really are easy and inexpensive! My friend Kathy taught me how to make these, and graciously lets me barrow her egg molds too. :o)

Ingredients for the sugar eggs:
5 Cups Sugar
1 Egg White
optional, Food Coloring

Other supplies:
Egg molds
knife and spoon
small decorations for inside
royal icing to decorate outside/inside

Directions:
1) Mix the sugar, egg white and food coloring well. It will have the consistency of damp sand.


2) Pack the sugar mixture into each half of the egg mold, and place flat side down onto a cookie sheet, carefully lift the mold away. (just like making sand castles when you were a kid)


3) Using a knife cut away the tip of the narrow end of both eggs. Try to remove the same amount from each half. (this will become your "peep" hole)


4) Allow eggs to dry for a couple hours, times vary depending on the size of your egg. The outside should be firm and dry, but the inside of the egg should still be soft.

5) Scoop damp sugar out of egg halves, leaving a "hollow" shell. Do not leave the sides too thin.

6) Using a spoon or your fingers carefully remove edge from trimmed end to make "peep" hole opening.

7) Leave egg halves upside down until inside is completely dry


8) use a dab of icing to secure bottom half of egg to board or plate covered in foil or parchment paper to keep egg from moving with constructing and decorating.

9) Use royal icing to decorate and secure items inside bottom egg half.


10) Run a bead of icing along shell edge and place top half of egg directly on top, lining up edges.

11) Use icing to cover seams and decorate around "peep" hole.

13) Add flowers and other decorations, using icing to secure them to the eggs.


14) Stand back and admire your work while realizing you are now one step closer to Martha

Some tips:
When you scoop out the middles of your eggs return the sugar mixture to your bowl to make more eggs!

When trimming out the peep hole of the semi-dried egg halves be careful, it will be dry and brittle and can leave a ragged hole if not done gently.

Icing hides a multitude of sins. If your egg cracks you can repair it with icing or if your peep hole is ragged cover it with icing or flowers.

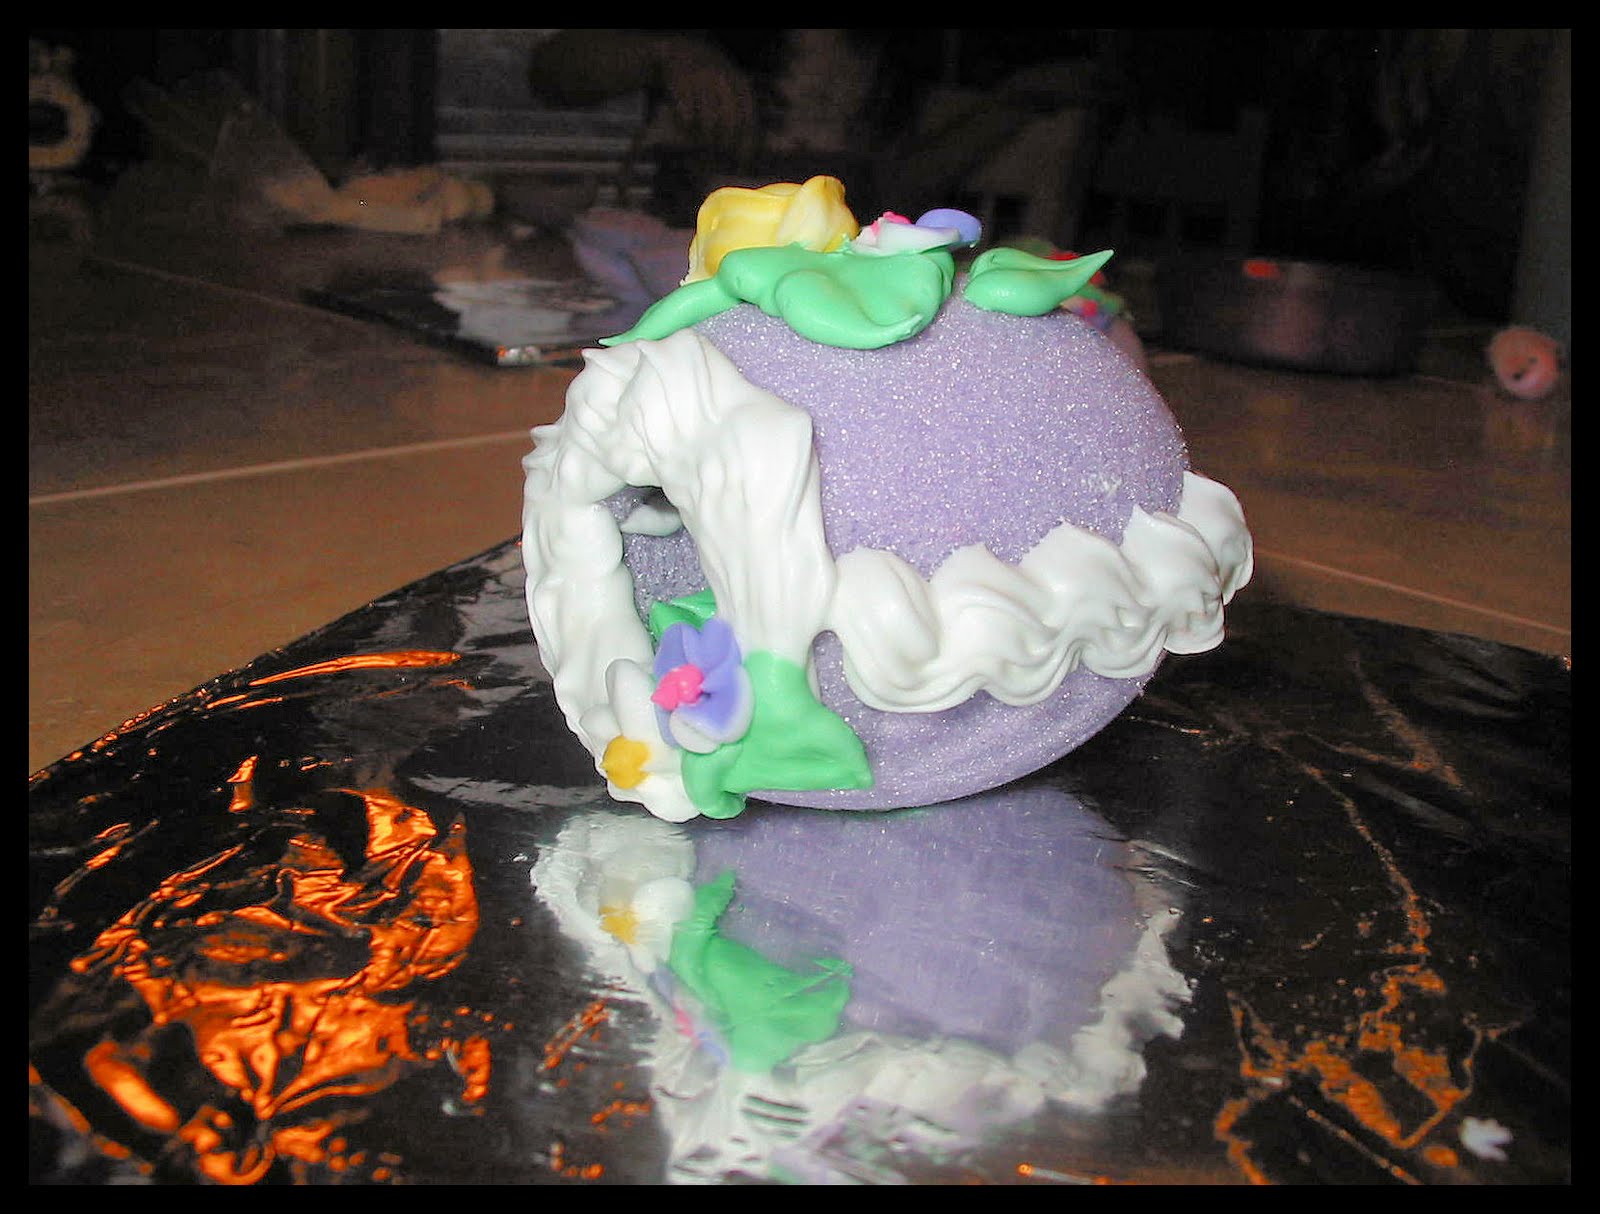
Can't find any molds? I used a traditional plastic easter egg to make this little cutie. :o)


Send me pics if you make any - I'd love to post them and link to your blog!

Friday, April 2, 2010

Sneek Peek into Easter Crafting!

Have some fun with the kiddos making crafty Easter eggs and decorations for this weekend!
I've been snooping around the blogosphere and have come back inspired,
ready for Easter weekend and Spring in general.

Here's' a little peek at what we're up to around here...


...Maybe a funky twist on dying eggs...


...Or making more traditional Easter goodness...


Check back tomorrow for our Ta Da moment,
And a tutorial  too!

Wednesday, March 24, 2010

Making Panoramic Sugar Eggs!

We made some sugar panoramic Easter eggs last night!

(For those who aren't in the know, they are hollow eggs made out of sugar that you can peek into and see a sweet little scene inside.)

Be sure to click on the image to get a good peek at the chick inside!

Have you ever made these?
They are so much easier to make than they look, and they last forever.
Seriously.
I've seen vintage sugar eggs in antique shops!

Plus, it's a minimal investment to create your own family heirloom.
Heirloom -is that a stretch?
all you need to get started  is egg whites, a ton of sugar, and some icing.
And of course, an egg mold.
or several.
they come in different sizes, ya know.
I like the itty bitty ones.

We made blue eggs last night and filled them with tiny Easter eggs and fluffy chicks.
I'm hooked -  I plan on making more with my kiddlets over the weekend.
Now I want to run to the dollar store and see what I can find to decorate the inside of my Easter eggs!

Want to know how to make these? Check out this post for a tutorial to make your own!

Wednesday, March 17, 2010

Happy St. Patricks Day!


Wishing you Irish bliss, and a day with no pinches!
...unless you want to be pinched, that is...
Related Posts Plugin for WordPress, Blogger...