Thursday, September 29, 2011

31 Days Challenge: Settling in After a Move


I'm in!
Starting October 1st I'll be posting for 31 days on how to settle into your new home after a move.


New Studio Woes

Yesterday I posted about the Studio I left behind in our old house. (If you missed that, go check it out so you can appreciate the tears that followed when I moved into my new studio) 


  This is what it looked like when we inherited it:


It was originally a soft yellowish color. Now, I love yellow. Love it. But this was dingy and had to go.
You can also see the lovely dropped ceiling. the rest of the basement does not have this ceiling, so I'm not sure why they did it here??


Behind the slated doors are the furnace, water heater and water softener. So when I start filling up this room, I should probably make sure these doors are accessible... (Keep that in mind, I'll suffer for it later.)
The other door leads to the "fruit room" or "cold storage room". Something that may be to be unique to Utah? I've never seen it anywhere else. It's a  narrow concrete room - basically the long hollow space left after pouring the cement for your porch. Canning and food storage is huge here in Utah, so that's what most people use it for. Me? Not so much. More like holiday decorations, luggage, you get the idea...


This little built in desk area seemed like a handy corner for all my crafting and paper stuff. Especially since that white desk and armoire would never fit down here with everything else. Unfortunately, once I started moving in I realized I couldn't donate this valuable space to paper.

While I was painting and cleaning, the space seemed pretty open. 
I thought "Hey, I can do this. Everything will fit just fine" 
Then the furniture arrived.
And I cried.
Then the "stuff" arrived.
And I cried. A lot.


I had the movers take care of all the furniture for me, and I told them to "just put it all in the room". I wasn't worried about placement, because I knew I would be pushing it from one wall to another, trying to figure out the best layout anyhow. That was my first mistake.
I planned to move all the "stuff" in after the furniture was in place. I thought me and a few girl friends, we'll take our time - no worries. Only, I spent more time cleaning and painting than anticipated, ran short on time, and lets just say it didn't work out how I had planned. It was just me and the Sarge on a time limit. Everything ended up dumped into the room. And you can see by the pictures, I am not exaggerating. everything. was. dumped.

My studio is always the last thing to get squared away when we move. So after the dumping, we ensured there was a path to Slicks bedroom and closed the door.

A week or so later, my water softener started leaking.
And yes, those doors were now blocked.

So, everything had to be shoved away from those doors, making the rest of the room even more inaccessible.
And after that, we had the cable guy out. To install my sons cable, he would need to get to the other side of my studio. Of course he would. 
It is a truely humbling moment when you see a man shimmy on the floor to crawl under and around your pile s of crap. I felt like one of those people on an episode of "Hoarders".

The good news is, I have since made progress. It's not complete - but it does not look like this anymore! You can get a glimpse of the new color in the dumped photos, what do you think?

Wednesday, September 28, 2011

Good-bye Old Sewing & Crafting Studio!

This was my studio before we moved into our current  home a few months ago.


 I loved this room! It was huge, at about 14x30 feet It was by far the biggest I've worked in! (Thanks mostly to the Air Force I've sewn in 7 spaces over the last 12 years)

 It was in the basement, but I had 3 full sized windows, so there was plenty of light. Plus, there was a full bathroom and bedroom on that level. Yeah -yeah, the bedroom and bathroom belonged to my son. But he's a Junior in high school so I had visions of turning that room into a very feminine chic guest room in a few short years if we had stayed.

 After 2 years this studio was still a work in progress. I had the layout where I wanted it, and everything was organized. Mostly what was left to do was cosmetic projects. While seriously functional, I still hadn't gotten around to the prettyfied part. (my prettiest studio was McChord AFB. sigh... that was a lovely space!)

My work area for my machines:


My cutting station:


Fabric storage:


Paper scrapping & crafting area:


Kadences sewing spot (was a work in progress):


My beloved cubbies:


My new studio is about 1/3 the size. It's not the smallest studio I've worked in ( not counting a corner in the kitchen, that would be Holloman AFB!) but it's been a bit of a shock to have to down size! Tomorrow I will post on my adventures on making my new space work, but first I must say Adieux.

Good bye, old studio.
 You weren't the prettiest, and I didn't get a chance to finish you the way I would have liked - or even sew in you as much as I wanted to - but you were so functional and roomy. You were my retreat from reality and provided an outlet for my creativity. We had many wonderful times together, remember how I would sew for hours and ignore my family? Or the joy we felt when I brought home a new piece of furniture for you? There were some bad times too, but the flood was not your fault - and you couldn't help the poor wiring that left circuit breakers tripping and some plugs completely useless. I will take that over sewing in a garage any day. I will miss you my friend, especially all your spaciousness and lovely windows. When a new family moves in and turns you into a playroom or TV room, I hope you remember that once you were a fabulous space. And not just any space, but a Studio. Where Beautiful things were created. And that you were loved.


sorry for the awful pics. It was a dreary day and my last chance to photograph this room before I up-heaved it to the new place. :o)
Also, don't forget to check out the MyMemories giveaway! there are 0 entries - an easy win!


Tuesday, September 27, 2011

MyMemories Suite Givaway & Promo!

Have you tried Digital Scraping yet?
I've been doing it for a few years now, and  love it!
I know a lot of people find it intimidating, especially the software. It's pricey and has a steep learning curve. I have a couple typical photo editing programs that are often used for Digi-scrapping: 
Photoshop (but haven't gotten around to figuring it out!) and PSP X, which is what I would normally use, but still have so much to learn there also!


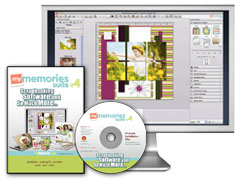
  So, when MyMemories.com  asked me to review their digital scrapbooking software "my memories suite" I jumped at the chance! I've been playing with it quite a bit, in fact, I used the "my memories suite" and designs to create the layouts I posted here and here.


I made this in under 1 minute(!) using Autumn Rose Quick Page FREEBIE

  Right off the bat there is one big difference: This is not a photo editing program that can be used for digital scrapping - this is a program created especially for digital scrapping! 

My Memories Suite digital scrapbooking software

Things I loved:
 Super easy-peasy to use. Seriously. If you are currently trying to learn a photo editing program you will be stunned at how simple it is to maneuver around my memories suite. 

 Not just for Dummies. Yes, it is easy to use - and an excellent first program if your just getting into Digital Scrapping. But, it's great for those of us who already know what we're doing, it has all the features to really make your layouts polished. So- whether your a beginner or not - your layouts will never look "beginner"!

 Instant down-load and categorizing of your "stuff". This may be my favorite part. Whenever you purchase any kits, embellishments, design packs - whatever - it is downloaded into the software, and categorized into folders so you can easily find it instantly and easily! No unzipping, filing, searching... I love that! You also can DL your stuff to any where, and use it with any photo program - versatile!

It comes Fully Loaded. Just getting started and don't want to buy a bunch of "digi-stuff" just yet? My memories suite comes fully stocked with a jazillion papers, ribbons, buttons, flowers and other embellishments to get you started. Plus, the program already has shapes, shadows, etc - so there are no actions to buy.

 Access to the Website directly from the software. If you own a Silhouette, you know what I mean. If you realize you want need something, just click and your there!
Drag & drop. Tons of templates - just drag and drop photos and you. are. done. Adding embellishments is just as easy. No files to open, "copy" or "save as". Nice.

Digital Scrapping taken to the next level. Add sound. Narration. Music. Need I say more? Okay, Publish. Print. Share.

Whats not to love? 
I only wish it had an eraser. 

Another made in about 1 minute using Quick Calendar FREEBIE

I know you're just dying to try this baby out now!
Good news!
As a special for all of you, Mymemories.com  is offering a $10 discount off the purchase of the My Memories Suite Scrapbook software and a $10 coupon for the MyMemories.com store ($20 value!)
Just use code: STMMMS80032 at checkout

Mymemories.com is also giving one lucky reader their own copy of my memories suite. Yay you! 
To enter:
Mandatory entry: go to Mymemories.com and the leave a comment letting me know which design pack is your favorite. 
For additional entries:  

Leave a comment below for each additional entry.

Winner will be chosen by random number generator.
Contest closes Sunday night. Winner announced Monday, October 3rd.

 . 
This giveaway is sponsored by MyMemories, I have received a copy of mymemories suite for review. All opinions expressed in above review are my own.

Monday, September 26, 2011

Bucket List Scrapping Challenge

Over at Journaling Junkie Stephanie proposed a challenge: Create your Bucket List
 I like to check out her blog because they have regular challenges, and whether you do digital scrapping or traditional paper scrapping the emphasis is on journaling (well, duh!) Plus there are tons of beautiful pages to motivate you if you're in a rut.
This challenge had me a bit stumped tho. There are plenty of things out there I want to do, but when it came time to put paper to pen, uh, finger to key board, I struggled. 
 The entry posted on her blog  is long and inspiring! Mine has 5 items. No pics.


Maybe it just means I'm pretty content, and if I were to be abducted by aliens tomorrow, I would have few regrets.
Or, maybe it just means I suck at this topic...
Either way, here is my Bucket list as of this moment:
  1. see the red woods
  2. take a vacation - just me and the Sarge
  3. sew a wiggle dress - and rock it (I am a good 30lbs from rockin' any dress right now)
  4. attend a Penn State "white out" game
  5. learn to swing dance


Mathlete Status, a Silhouette Project

Kadence is rockin' the Mathlete status!


When she formed a "Math Club" at school 
I said "you know what that makes you, right?"
"a nerd?"
"No! A Mathlete!"
"a mathlete? cool! we should totally make a t-shirt that says that"
"totally!"

Thus, the "Mathlete" T-shirt was born.


I used my Silhouette and freezer paper to create the stencil, then just bleached it out. 
We also cut some slits into the sleeves to add a little funk to the mix.
Easy-peasy project! 


Kadence says the next one should say
Cutie π
(that's cutie pie for us non-mathletes)

Anthony suggested
if π r2 are then why aren't they called cake?
(and that would be, if pie are squared, then why aren't they called cake?)

I see many Math-related shirts in my future.

linking to: sew darn crafty

Friday, September 23, 2011

Red Door Adventures

What says "Welcome" more than a red door?


The door was a bland tan to begin with, so painting it wasn't a hard sell. 
In fact, it was a lot easier than I expected...

me: I want to paint our front door red, wouldn't that look awesome?
Sarge: sure
me (preparing to throw a tantrum if necessary): Really? ya know, I want to paint the inside red too.
Sarge: Might as well. If your gonna do it, do it.
me (now feeling empowered): I want to paint the kitchen door red too.
Sarge: sure
me: I want the inside red too...
Sarge: I think you should paint the family room door to the garage while you're at it.

And so with that conversation and a conveniently timed commercial for Glidden door paint we were off to buy some red paint. This paint comes in a limited pallet, with 2 reds.

Who knew? Another battle I didn't have to fight!

me: okay, which red? 
(please pick classic red... please pick classic red...)
Sarge: I like Classic Red
me: really?!
Sarge: Well yeah. If you're gonna go red, go red.

So, I went RED.

And I'm so glad I did! I am in love with my newly painted door.
It's just so shiny, and RED!


And I am so happy that I painted the inside too!


Next I'm going to tackle the french doors in the kitchen.
Though, I'm still not sure if I'll paint the family room door red yet...


Related Posts Plugin for WordPress, Blogger...